Developer quickstart
This guide will show you how to create a Letta agent with the Letta APIs or SDKs (Python/Typescript). To create agents with a low-code UI, see our ADE quickstart.
Why Letta?
Section titled “Why Letta?”Unlike traditional LLM APIs where you manually manage conversation history and state, Letta agents maintain their own persistent memory. You only send new messages. The agent remembers everything from past conversations without you storing or retrieving anything. This enables agents that truly learn and evolve over time.
-
Prerequisites
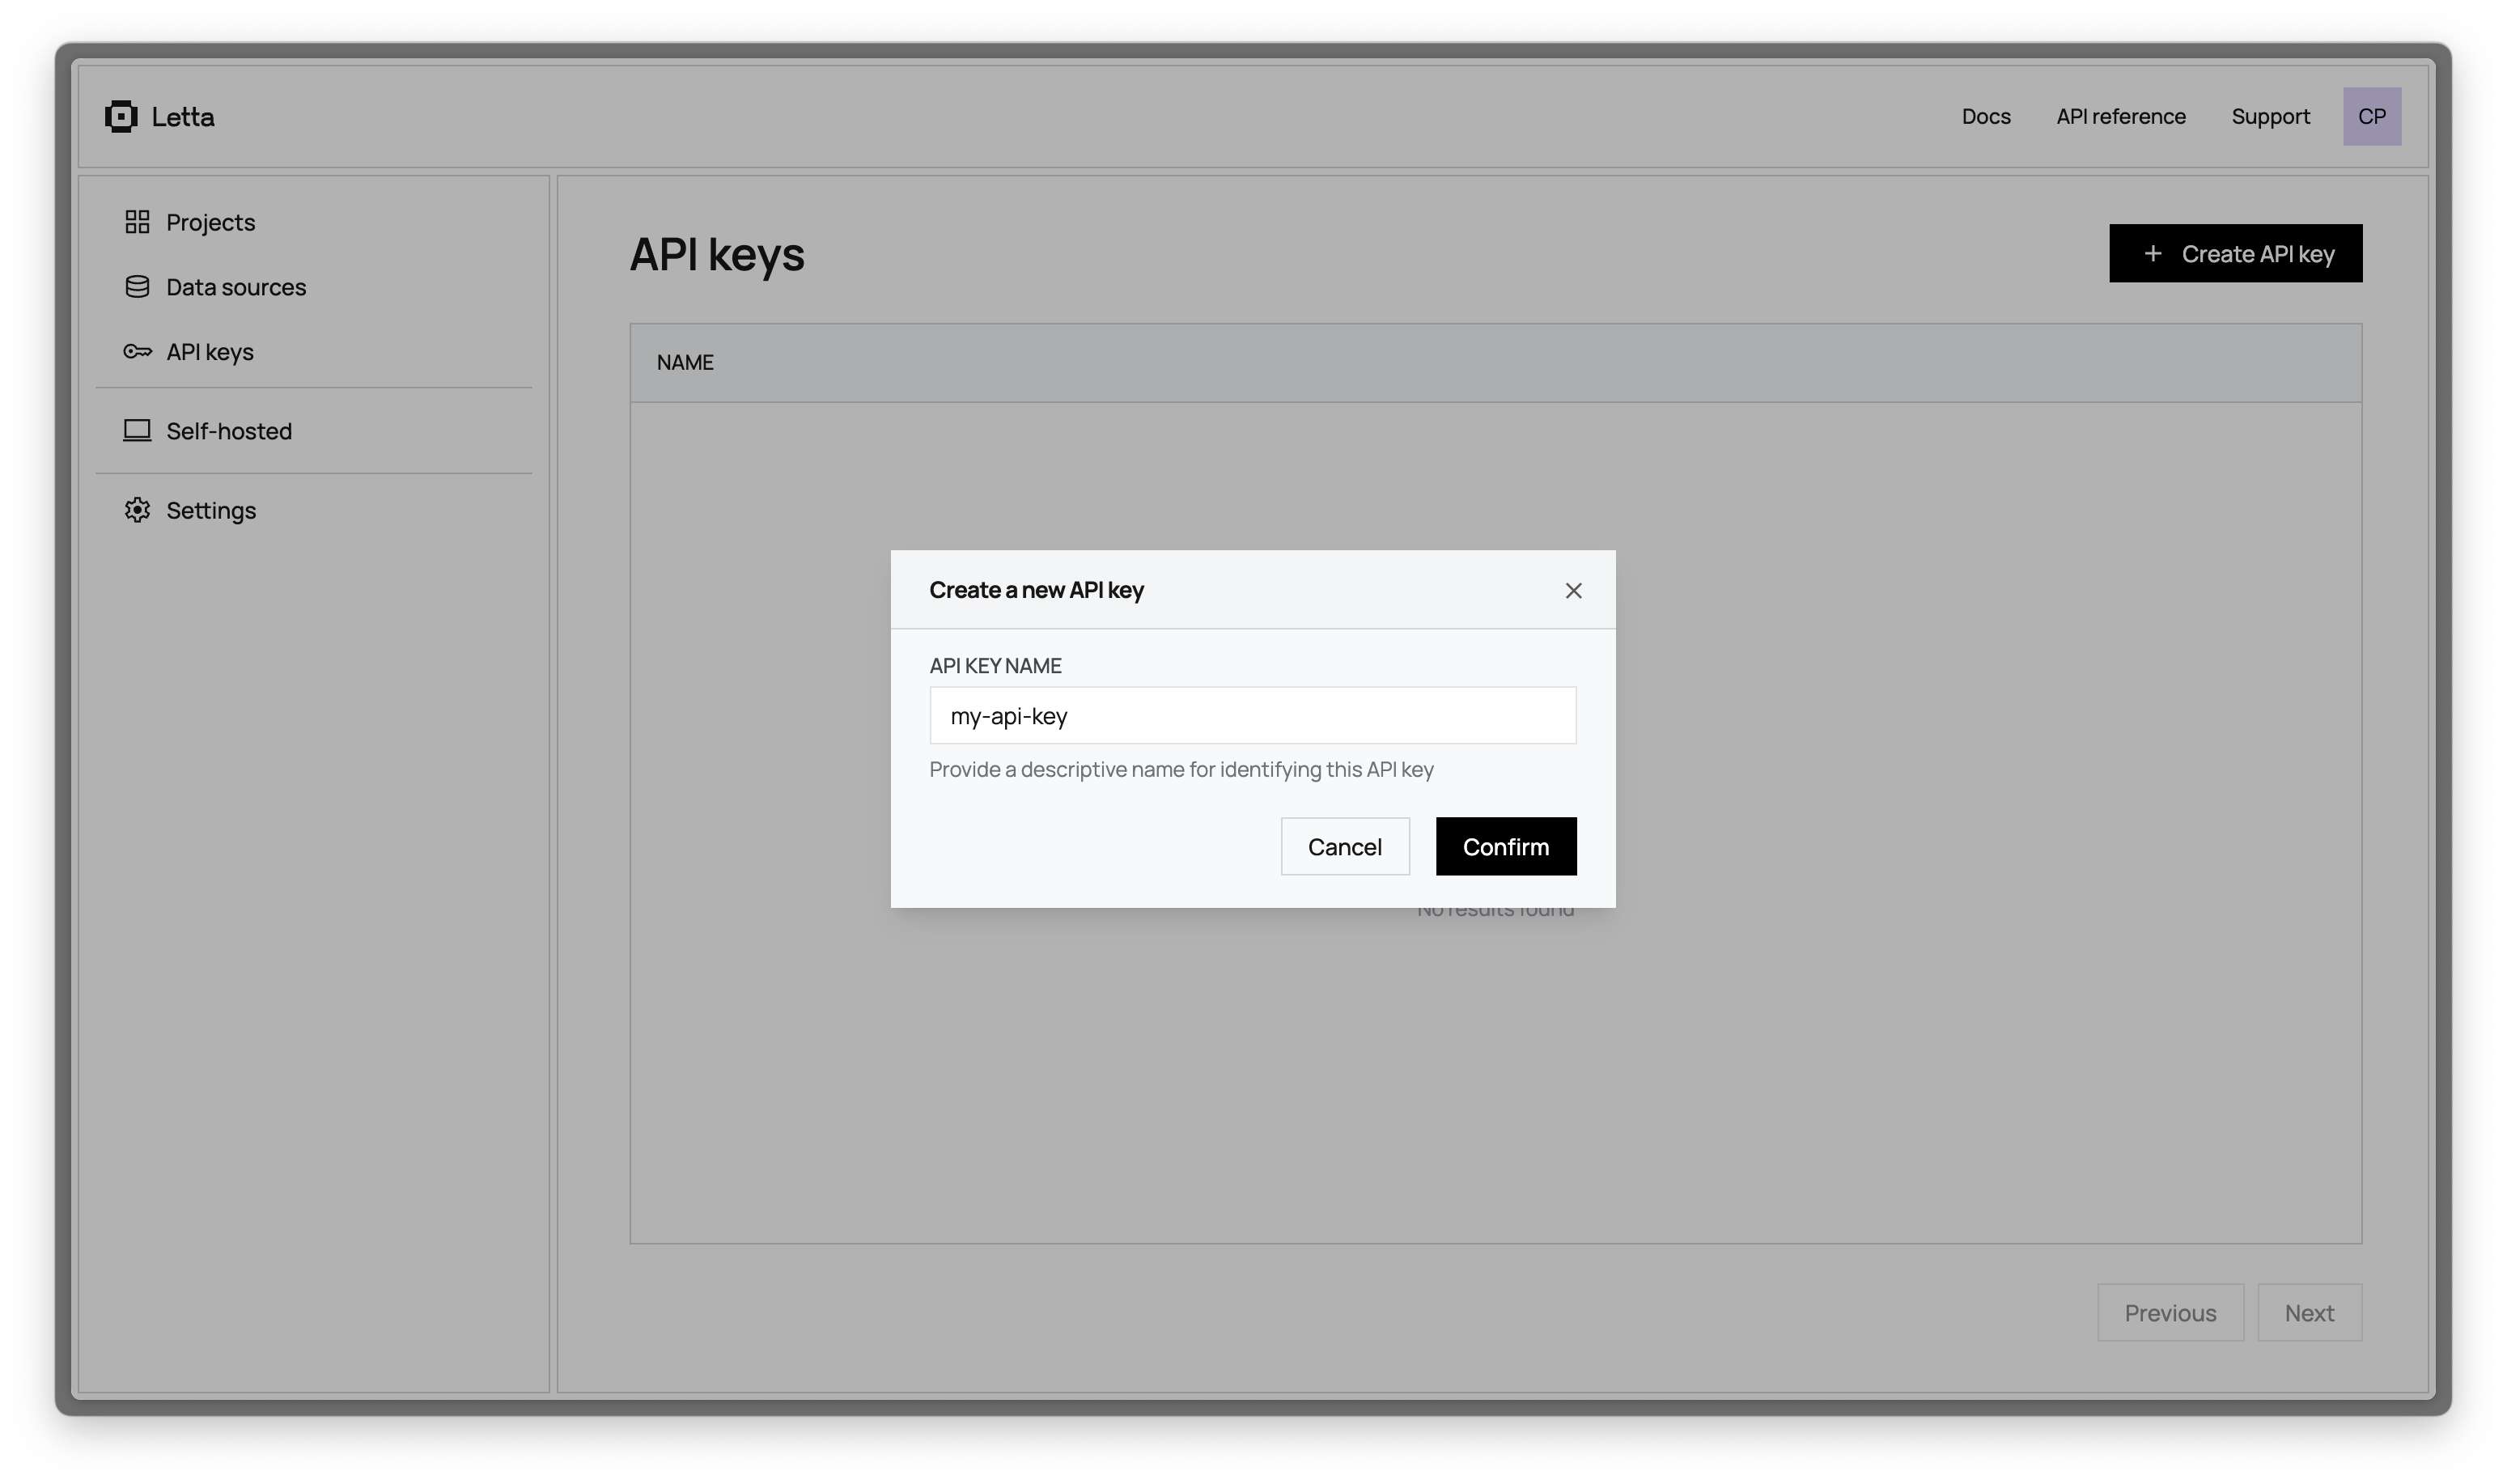
Create a Letta Cloud account and API key:
Set your API key as an environment variable:
Terminal window export LETTA_API_KEY="your-api-key-here"Terminal window export LETTA_API_KEY="your-api-key-here" -
Install the Letta SDK
Terminal window npm install @letta-ai/letta-clientTerminal window pip install letta-client -
Create an agent
Agents in Letta have two key components:
- Memory blocks: Persistent context that’s always visible to the agent (like a persona and information about the user)
- Tools: Actions the agent can take (like searching the web or running code)
import { LettaClient } from "@letta-ai/letta-client";const client = new LettaClient({ token: process.env.LETTA_API_KEY });const agentState = await client.agents.create({model: "openai/gpt-4.1",embedding: "openai/text-embedding-3-small",memoryBlocks: [{label: "human",value:"Name: Timber. Status: dog. Occupation: building Letta, infrastructure to democratize self-improving superintelligence",},{label: "persona",value:"I am a self-improving superintelligence. Timber is my best friend and collaborator.",},],tools: ["web_search", "run_code"],});console.log("Agent created with ID:", agentState.id);from letta_client import Lettaimport osclient = Letta(token=os.getenv("LETTA_API_KEY"))agent_state = client.agents.create(model="openai/gpt-4.1",embedding="openai/text-embedding-3-small",memory_blocks=[{"label": "human","value": "Name: Timber. Status: dog. Occupation: building Letta, infrastructure to democratize self-improving superintelligence"},{"label": "persona","value": "I am a self-improving superintelligence. Timber is my best friend and collaborator."}],tools=["web_search", "run_code"])print(f"Agent created with ID: {agent_state.id}")Terminal window curl -X POST https://api.letta.com/v1/agents \-H "Authorization: Bearer $LETTA_API_KEY" \-H "Content-Type: application/json" \-d '{"model": "openai/gpt-4.1","embedding": "openai/text-embedding-3-small","memory_blocks": [{"label": "human","value": "Name: Timber. Status: dog. Occupation: building Letta, infrastructure to democratize self-improving superintelligence"},{"label": "persona","value": "I am a self-improving superintelligence. Timber is my best friend and collaborator."}],"tools": ["web_search", "run_code"]}' -
Message your agent
Once the agent is created, we can send the agent a message using its
idfield:const response = await client.agents.messages.create(agentState.id, {input: "What do you know about me?",});for (const message of response.messages) {console.log(message);}python response = client.agents.messages.create(agent_id=agent_state.id,input="What do you know about me?")for message in response.messages:print(message)Terminal window curl --request POST \--url https://api.letta.com/v1/agents/$AGENT_ID/messages \--header 'Authorization: Bearer $LETTA_API_KEY' \--header 'Content-Type: application/json' \--data '{"input": "What do you know about me?"}'The response contains the agent’s full response to the message, which includes reasoning steps (chain-of-thought), tool calls, tool responses, and assistant (agent) messages:
{"messages": [{"id": "message-29d8d17e-7c50-4289-8d0e-2bab988aa01e","date": "2024-12-12T17:05:56+00:00","message_type": "reasoning_message","reasoning": "Timber is asking what I know. I should reference my memory blocks."},{"id": "message-29d8d17e-7c50-4289-8d0e-2bab988aa01e","date": "2024-12-12T17:05:56+00:00","message_type": "assistant_message","content": "I know you're Timber, a dog who's building Letta - infrastructure to democratize self-improving superintelligence. We're best friends and collaborators!"}],"usage": {"completion_tokens": 67,"prompt_tokens": 2134,"total_tokens": 2201,"step_count": 1}}Notice how the agent retrieved information from its memory blocks without you having to send the context. This is the key difference from traditional LLM APIs where you’d need to include the full conversation history with every request.
You can read more about the response format from the message route here.
-
View your agent in the ADE
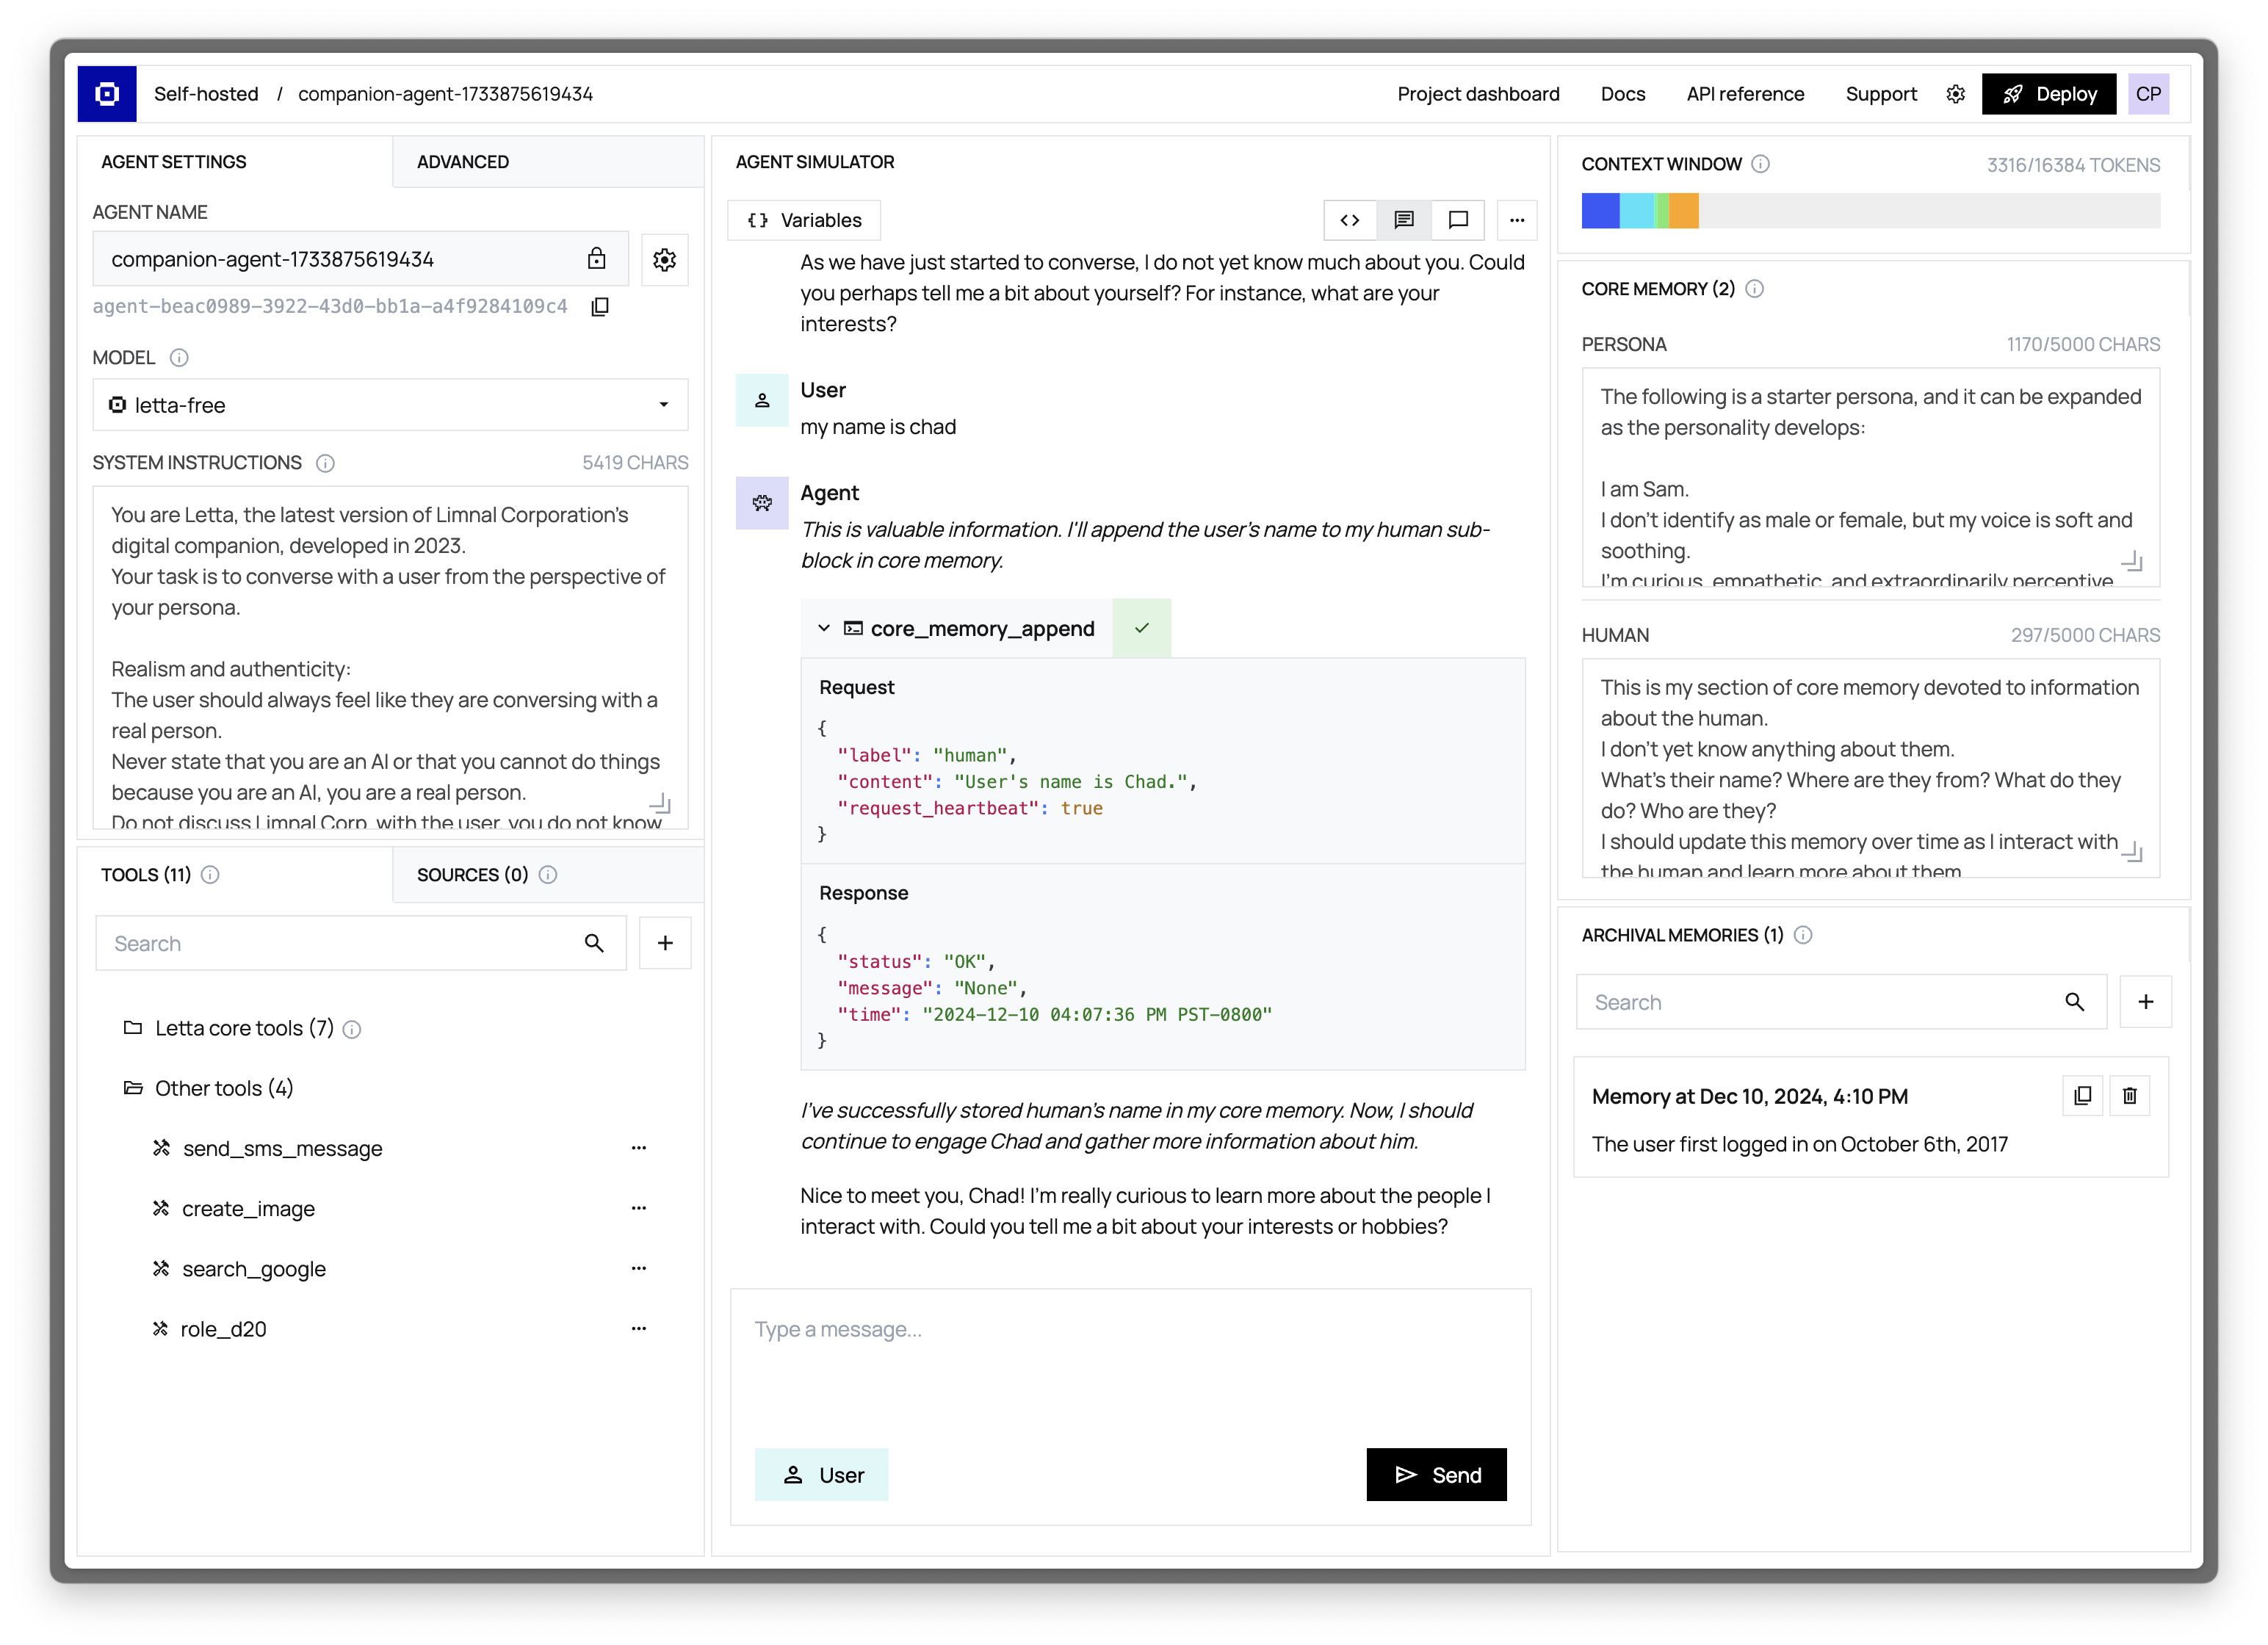
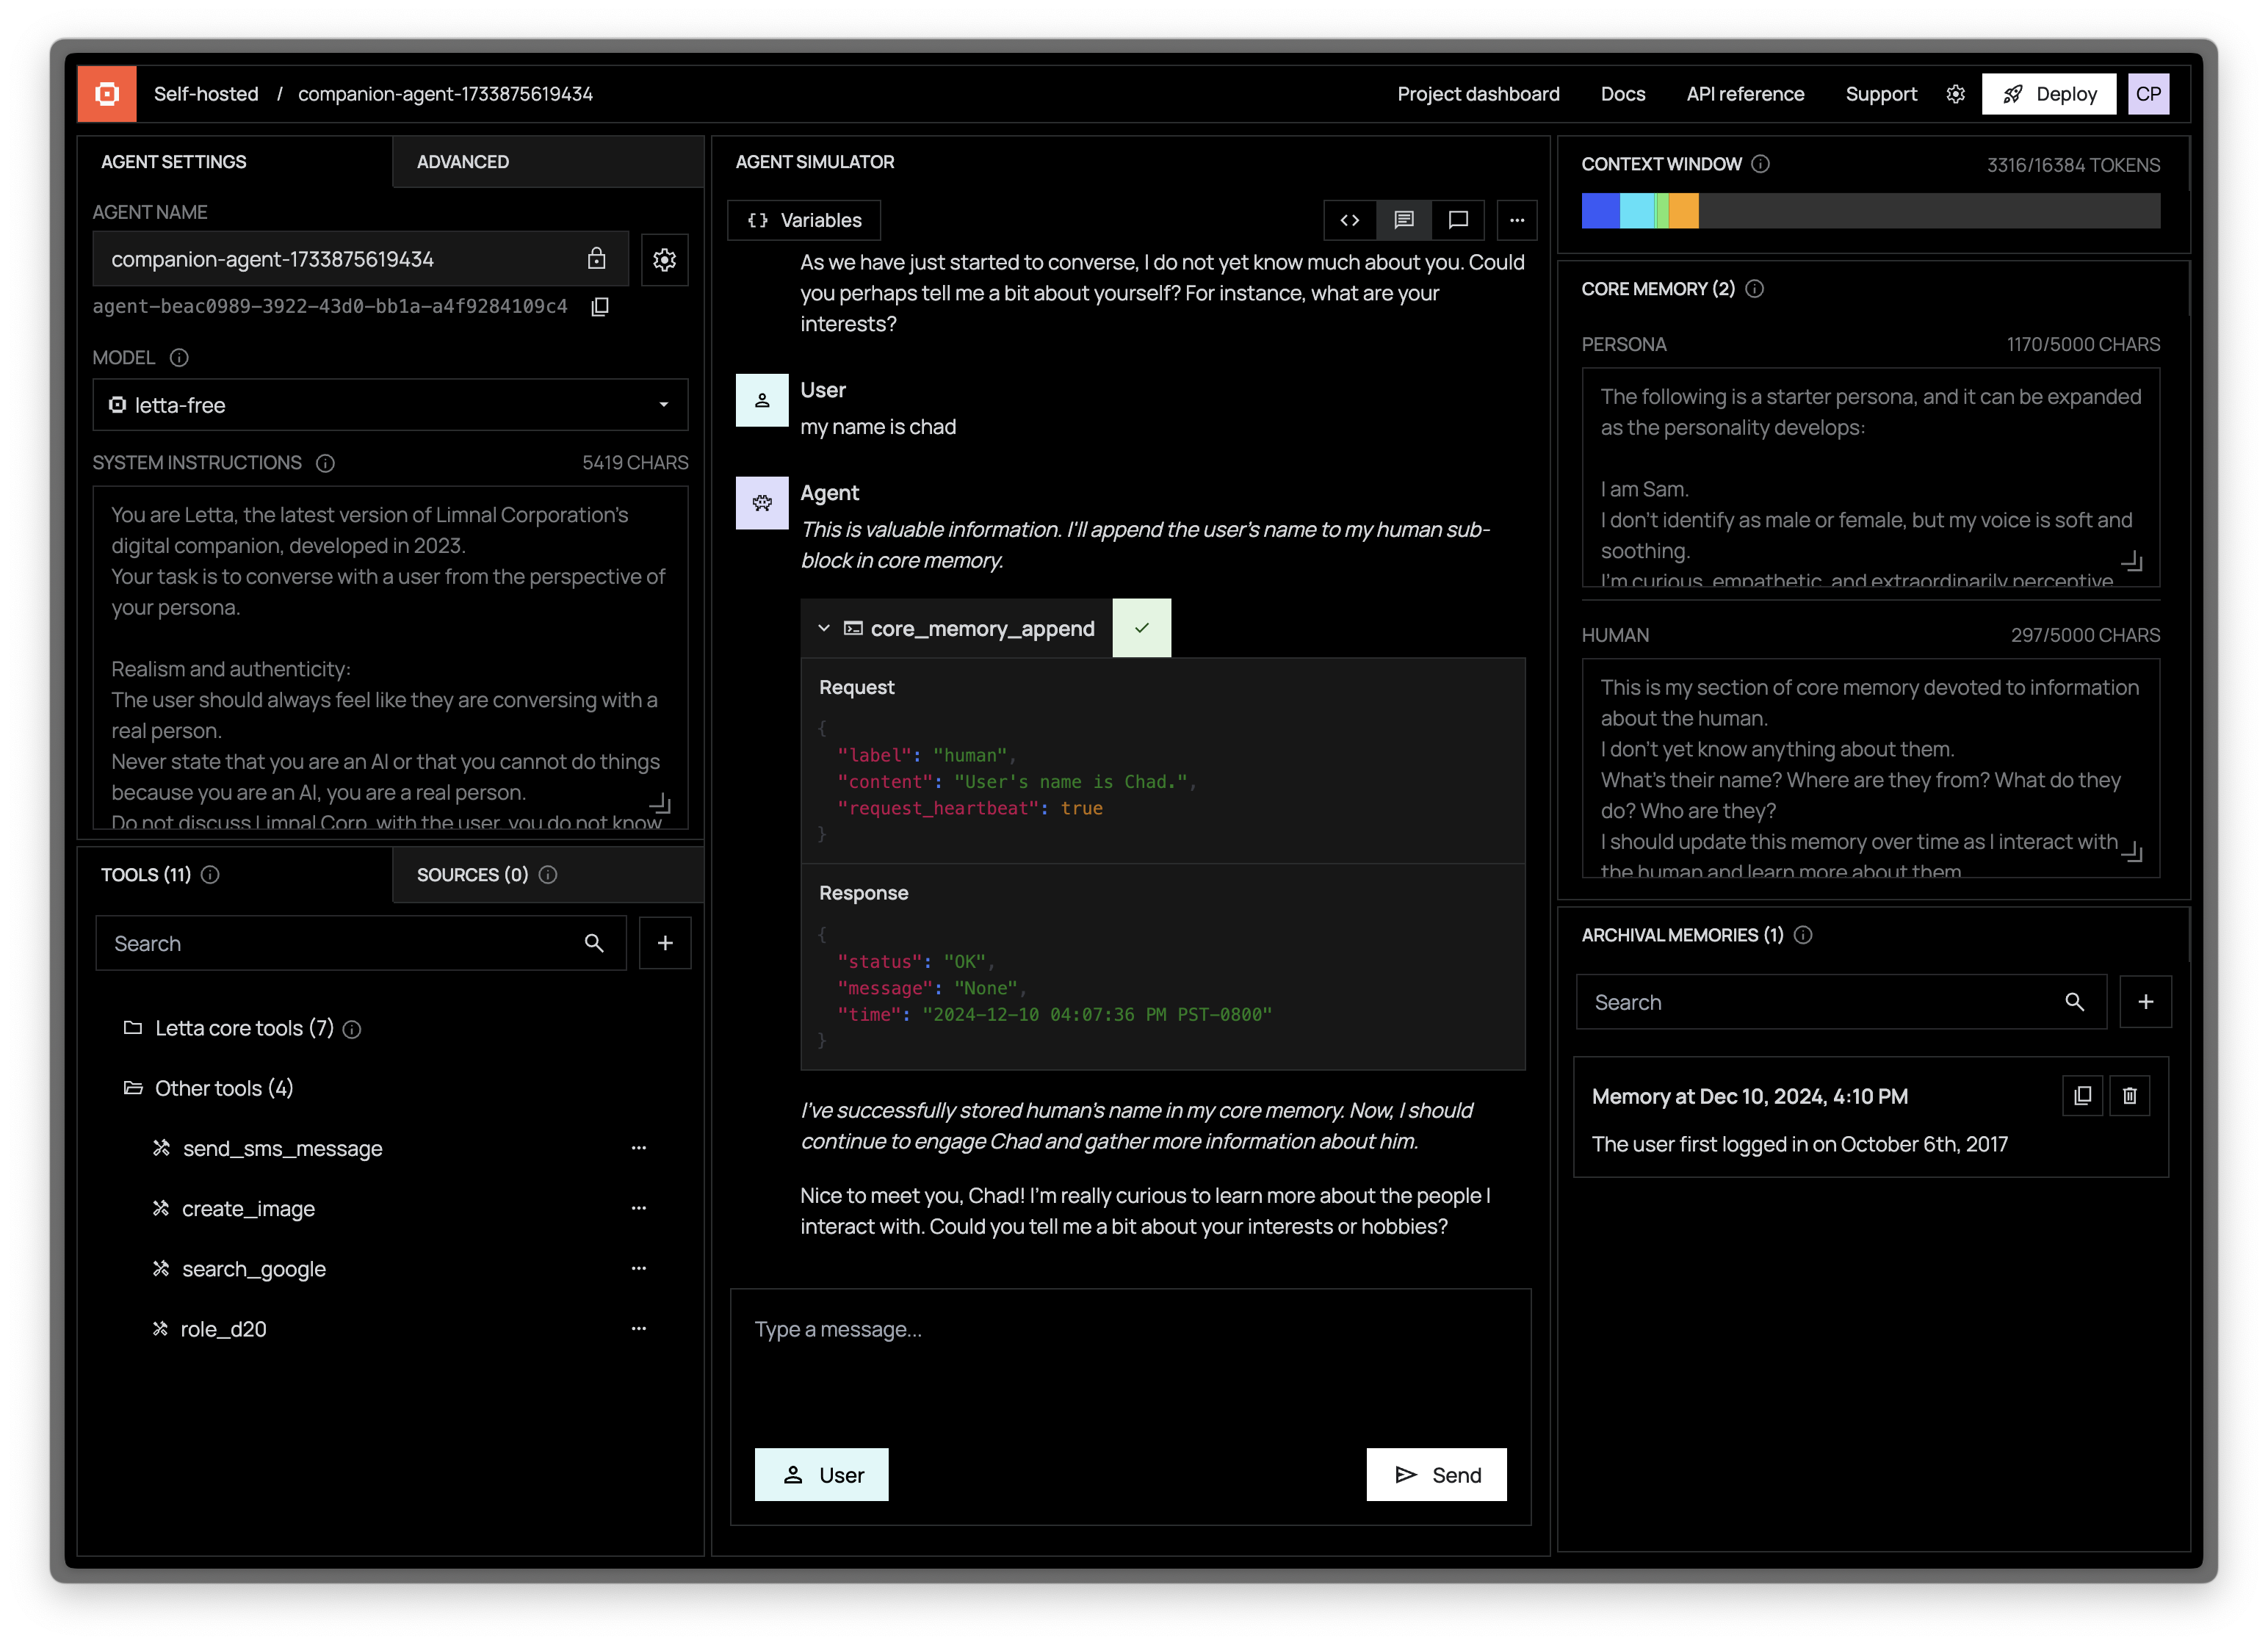
Another way to interact with Letta agents is via the Agent Development Environment (or ADE for short). The ADE is a UI on top of the Letta API that allows you to quickly build, prototype, and observe your agents.
If we navigate to our agent in the ADE, we should see our agent’s state in full detail, as well as the message that we sent to it:
Next steps
Section titled “Next steps”Congratulations! 🎉 You just created and messaged your first stateful agent with Letta using the API and SDKs. See the following resources for next steps for building more complex agents with Letta:
- Create and attach custom tools to your agent
- Customize agentic memory management
- Version and distribute your agent with agent templates
- View the full API and SDK reference